
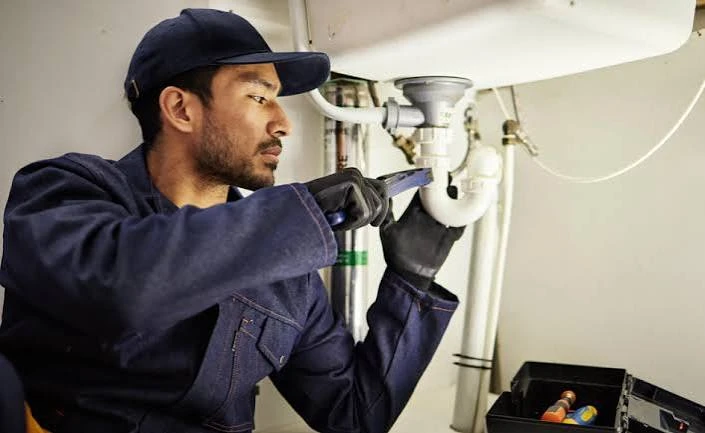
A professional leak survey typically follows five stages: a conversation about the symptoms you’ve noticed, a visual walk-through of the property, testing with specialist equipment such as acoustic listening devices and thermal imaging cameras, isolation testing on individual pipe sections, and a final report explaining exactly where the leak is and what repair work is needed. The whole process is designed to find the leak with minimal disruption, often without lifting a single floorboard.
When your water bill spikes for no obvious reason, or you notice a damp patch spreading across a ceiling, calling in a professional for leak detection and repair is usually the quickest way to find out what’s actually happening behind your walls and under your floors. A proper leak survey combines visual inspection, listening equipment, and pressure testing to track down hidden leaks without ripping up the whole house. Most surveys take between one and three hours, depending on the size of the property and how well the leak is hiding.
Why a Leak Survey Isn’t Just Guesswork
Homeowners sometimes picture a plumber turning up, having a poke around, and taking an educated guess at where the pipe has failed. That’s not how a proper survey works. Trained technicians use a mix of experience and equipment to rule out possibilities systematically, the same way an electrician traces a fault rather than replacing wiring at random. Guessing wrong on a leak means opening up the wrong wall or digging up the wrong section of garden, which costs time and creates damage that didn’t need to happen.
Not every damp patch means a burst pipe. Condensation, poor ventilation, and rising damp can all mimic the signs of a leak. A survey usually starts by ruling these out, since treating condensation as a plumbing leak wastes everyone’s time.
Step 1: The Conversation Comes Before the Tools
Every good survey starts with questions, not equipment. The technician will ask when you first noticed the problem, whether your water bill has changed, whether any flooring or walls feel warm in one spot, and whether you’ve heard any hissing or dripping sounds. This conversation narrows down the search area before a single tool comes out of the van, and it often points straight at the likely pipe run.
Step 2: Visual Inspection of the Property
Next comes a walk-through of the affected areas and the property generally. The plumber checks for staining on ceilings and walls, soft or warped flooring, peeling paint, mould growth, and any pooling water around appliances or outside taps. Outside, they’ll look at the meter box, the ground above known pipe runs, and any unusually green or soggy patches of lawn, since a leaking supply pipe often feeds nearby grass better than the rest of the garden.
Checking the Water Meter
A simple but reliable first test: turn off every tap and appliance in the house, then watch the water meter. If it keeps ticking over with nothing running, water is escaping somewhere on your side of the meter. This single check narrows a whole-house mystery down to “yes, there’s a leak” before any specialist gear gets involved.
Step 3: Bringing In the Detection Equipment
This is where water leak detection services really earn their keep. Once the visual checks and meter test point to a genuine leak, the technician brings in tools built specifically for finding pipes hidden behind concrete, plaster, and soil.
Acoustic listening devices pick up the faint sound of water escaping under pressure, even through solid floors. The technician moves a sensor across the suspected area and listens for the leak’s signature sound, which gets louder as they get closer to the source.
Thermal imaging cameras show temperature differences on walls and floors. A hot water leak often shows up as a warm patch that has no business being there, while a cold supply leak can show up as an unexpectedly cool patch.
Moisture meters measure water content in materials like plaster, wood, and drywall, helping confirm whether dampness is fresh, ongoing, or an old stain that’s already dried out.
Step 4: Pressure Testing to Isolate the Fault
With a general area identified, the next step is narrowing things down to a specific pipe run. Pressure testing involves isolating sections of pipework and pressurising them with air or water to see which section loses pressure. This step is what separates “somewhere in this wall” from “this exact pipe, roughly here.” For multi-story properties or complex plumbing layouts, this stage can take the longest, since each section needs to be tested in turn.
Step 5: Pinpointing and Confirming the Leak
By this stage the technician usually has a strong idea of the leak’s location, sometimes down to within a few centimetres. Before any wall or floor gets opened up, most tradespeople will double check with a second pass of the acoustic or thermal equipment to confirm the finding. Getting this step wrong means opening up drywall unnecessarily, so a careful technician takes the extra few minutes here.
Step 6: Explaining Your Repair Options
Once the leak is located, a good plumber walks you through what’s actually involved in fixing it rather than just starting work. Depending on the pipe material, location, and extent of damage, plumbing leak repair might mean a simple spot repair, a full section replacement, or in some cases relining the pipe without digging it up at all. You should come away from this conversation understanding what caused the leak, what the fix involves, and roughly how long the repair will take.
Common Repair Methods
- Spot repair: cutting out a small damaged section and replacing it, used when the rest of the pipe is in good condition
- Full pipe replacement: swapping out an entire run, typically needed when a pipe has corroded throughout its length
- Pipe relining: inserting a new liner inside the existing pipe, useful for underground runs where digging would be disruptive
- Fitting replacement: sometimes the leak isn’t the pipe at all but a worn joint, valve, or fitting that simply needs swapping out.
When a Leak Becomes an Emergency
Not every leak needs a technician on site within the hour, but some situations do. A burst pipe flooding a room, water coming through a light fitting, or a leak near your electrical consumer unit all call for emergency leak repair rather than a scheduled survey. In these cases, shutting off your stopcock immediately and calling for help is more important than trying to diagnose the exact cause yourself.
When should you call for an emergency repair instead of booking a survey? Call immediately if water is actively flooding a room, if a leak is anywhere near electrical wiring or sockets, or if you can’t locate your stopcock to stop the flow. A scheduled survey is fine for slow leaks, rising bills, or damp patches that have been stable for a while.
What Happens After the Survey
Once the leak is found and the repair method agreed, most companies will either carry out the fix on the same visit or schedule a follow up appointment if specialist parts or access equipment are needed. You should receive a clear explanation of what was found, photos or readings where relevant, and any recommendations for preventing similar leaks in future, such as insulating exposed pipework or replacing an ageing section before it fails completely.
DIY Checks vs Professional Survey
| Method | What it can tell you | Limitations |
| Watching the water meter | Confirms a leak exists somewhere | Can’t tell you where |
| Checking for damp patches | Points to a general area | Damp can travel from the actual source |
| Listening for dripping sounds | May suggest a nearby leak | Untrained ears miss faint sounds under concrete |
| Acoustic and thermal equipment | Pinpoints the likely pipe run | Requires trained interpretation of readings |
| Pressure testing | Confirms the exact section at fault | Needs isolation valves and technical know-how |
Frequently Asked Questions
1. How long does a leak detection survey take?
Most surveys take one to three hours, though larger properties or leaks hidden in multiple pipe runs can take longer.
2. Does finding a leak always mean walls or floors need to be opened up?
No. Acoustic and thermal equipment is designed to locate leaks without damage, so many are pinpointed without any need to break into walls or lift flooring. Opening up a small section is usually only needed to carry out the repair itself, not to find the leak.
3. Can a leak be present without any visible water damage?
Yes. Slow leaks under a slab or behind tiling can run for months before showing on the surface, often first noticed through a rising water bill rather than any visible sign.
4. What’s the difference between a slab leak and a normal pipe leak?
A slab leak occurs in pipework running under a concrete floor, while a normal pipe leak can be anywhere in the wall or ceiling cavities. Slab leaks typically need specialist detection equipment since they’re harder to access and pinpoint.
5. Is a leak survey worth it if I already know roughly where the leak is?
Yes, because “roughly where” and “exactly where” are very different when it comes to opening up a wall. A short survey can save you from cutting into the wrong spot.
6. Can a leak fix itself over time?
No. A leak in a pressurised pipe will not seal itself and typically gets worse, since the constant pressure keeps working at the weak point. Left long enough, a small leak often becomes a larger one.
Final Thought :
A hidden leak rarely gets better on its own, and guessing at repairs usually just delays the real fix while causing extra damage along the way. Working with an experienced team that understands the full process, from initial questions through to equipment based diagnosis and a properly explained repair, makes the difference between a quick resolution and a repeat call out a few months later. 0800 Homefix has plumbers who follow exactly this kind of structured approach, so you get a clear answer about what’s wrong and a repair that actually holds.
